JAYNE SHATZ POTTERY
PhD-Prehistoric Ceramics
MA- Pottery and Sculpture
BA - Art History
DECORATING POTTERY AND SCULPTURE
WITHOUT A GLAZE
Written by Jayne E. Shatz
Why would a veteran ceramist want to stop using glazes?
For 47 years I had a pottery business; I made functional pottery for the home, taught ceramics and sculpture in a New York High School; directed a ceramics program for a community college in the evenings, and presented workshops in museums and art centers. I also pursued an academic agenda receiving a BA in Art History; an MA in Pottery and Sculpture, and a PhD in Ceramic History, with a concentration in Prehistoric Ceramics. I exhibited my sculpture and vessels in museums and art centers as well as pursuing the craft fair circuit with my production ware. I published articles on glaze techniques and recipes, specializing in cone 6 glazes in the prevailing ceramic magazines and books. I created videos on ceramic techniques and glazing, and established a YouTube channel showcasing abridged versions of my videos. For 15 years I continued to be one of the producers of the Clay Connection Mid Atlantic Clay Conference, a four day event showcasing national and regional ceramists. I love my career and met many wonderful people. I retired from teaching fifteen years ago, and then after almost five decades, the physical aspects of the production pottery component became difficult; I wanted a change. I needed a change.
I began using patinas on my sculptures in lieu of glazes early in the 1980’s. As a young artist, I was profoundly influenced by the 20th century greats, especially Peter Voulkos. Voulkos’ work was analogous to Jackson Pollack, in that the two men were pioneers in their artwork, breaking ground in the free association of form and surface application. Voulkos, like Pollack, used paint differently than his contemporaries. Pollack used thin house paint, often on unprimed canvases, allowing the paint to seep into raw cloth; he also stopped using a brush and painted in the air with a stick, letting paint drop onto the canvas from this swirling tool. Voulkos used enamel paint instead of glazes on many of his vessels and sculptures; he did not care to use glaze, rather was more excited with the immediacy of paint. I met Voulkos one summer in Saratoga, NY, remembering him saying that if you weren’t going to use the piece for eating, why bother dealing with glazes? This made sense to me. I felt that glazing became limiting and the employment of paint was more colorful, spontaneous and freer than dealing with glazes. The kiln became an impediment to the fluidity of the work. I pursued Raku, sawdust firing, and pit firing, all providing wonderful results and lots of fun, but, always, the kiln component was there-I desired something else. Non glazing and the use of paint was a breakthrough for Voulkos; it could be a new beginning for me! I began using paint on all my work.
The irony is, I was a glaze specialist, in a field that loves and relies upon glazes. However, as with all art, accepting the unfamiliar creates growth.
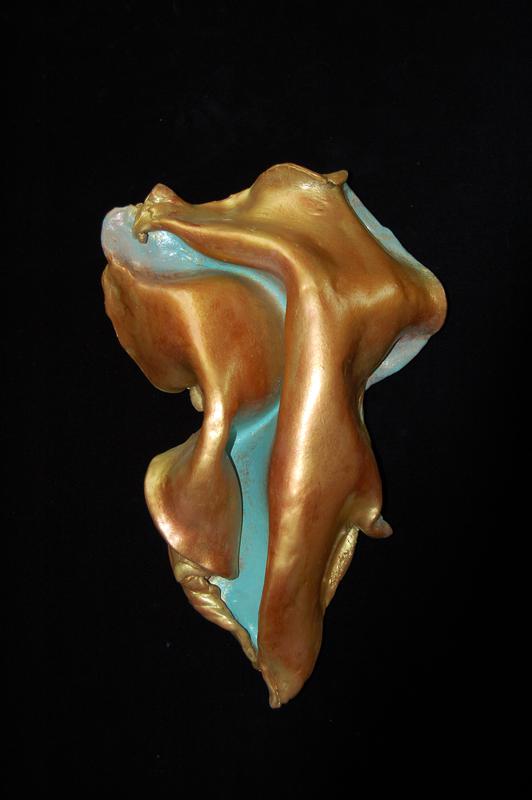
I started with an acrylic metallic bronze to duplicate actual bronze. This was great, especially for figurative work. I could produce sculptures that were made of clay, and with the bronze patina they looked like actual bronze. But then I went further, using many different colors, increasing my palette. Much of my work is abstract and the implementation of a painterly surface works well with the forms. In 2018 I retired from my production pottery business, removing my wheels and glaze chemicals from my studio. This was huge! I was committing myself to a whole new artistic pursuit. No more carrying production work to craft shows, art centers and sales venues. I changed the focus of my studio to include painting on canvases as well as ceramic sculptures and vessels. After using paint on both media, I found they were incredibly compatible. I work with shaped canvas merged onto flat canvases that refer to my sculptures; I use the slab machine and extruder to create sculptures and vessels in clay. Brushwork that I used for decades on my pots became the seedlings of my paintings. The work began moving back and forth, all making sense.
The irony is, I was a glaze specialist, in a field that loves and relies upon glazes. However, as with all art, accepting the unfamiliar creates growth. Now I don’t use glazes at all but rather I apply acrylic paint to all my forms. In this article, I will share my technique of applying acrylic patinas on ceramic ware.
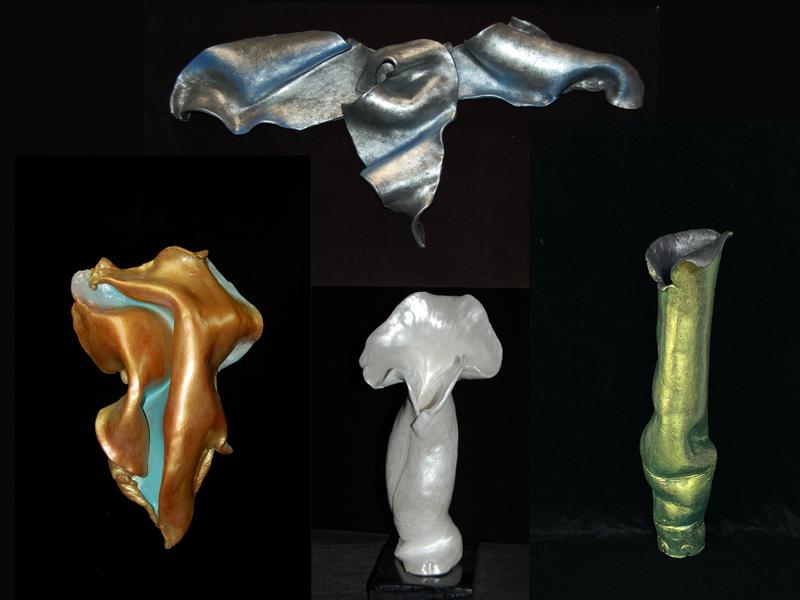
My work is free standing figures, wall sculptures and slab and extruded bottles. None of the bottles are meant to hold liquids; they are non functional forms. I fire to cone 02, which is harder and tighter than the cone 06 temperature I used to fire for pre glazing. Even with a slow firing schedule for sculptural forms it only takes about ten hours to fire, no smelly fumes from glazes and very little wear on my elements. I am creating much less work than I used to, each of the pieces being more “one of a kind”, meant for display rather than functionality.
INSTRUCTIONS
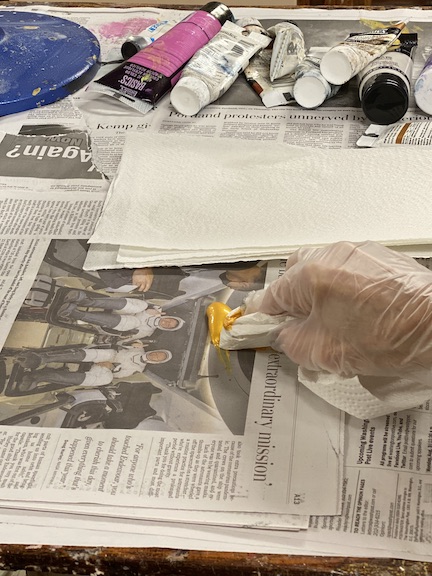
So, let’s begin! Prepare your work area. I like to cover my table with newspaper, allowing me to use newspaper as a palette, tearing away paper as it is used. I use a brush only for the base coat of paint, then I work with paper towels for smudging more paint over the base coat. I use a good quality paper towel like Bounty, as a cheap brand will break down, while the better towel stays intact and becomes soft, enabling me to smudge the colors for blending.
For the Cyan Patina, as displayed on the Ribbed Vase, I use a brush and paint the piece with black paint. I use Artist Loft Flow Acrylic for the base, as it is cheaper than tube paint for the undercoat. I tone down the black with a little white to achieve a gunmetal black, it is warmer than bright black, and provides a soft dark base coat, and very similar to one of my cone 6 glazes. After the base has been applied, I let it dry and then with a paper towel, I begin applying a gold metallic paint, rubbing it quickly onto the surface, allowing some of the black to show. After that I use a metallic blue paint and when applied onto the damp gold, I get a beautiful gold green effect. These metallic paints are in tubes, they are thick and blend well. I use Liquitex Basic Acrylic which is a good quality paint for metallics and regular colors for tinting. I play back and forth between the gold and blue until I get the shade I desire. Another combination I employ is a gold liquid base and then towel on tubed copper, gold and a prepared mixture of blue and green.
I use a silver base paint for cooler effects, with blue, pink or plain black. Your base can be any color that will provide a palette of interest. The pieces shown were made in a stoneware clay body, fired to cone 02, which provides a creamy tan form. I also use porcelain, as that was half of my pottery output as a production potter. When using porcelain, I let the white be the discerning factor, and add hints of color or none at all, allowing the white to speak for itself. I prefer the Artist Loft Iridescent White acrylic paint as the base and sometimes a final sparkling white coat. If I want a soft ivory color, I use Liquitex Basics Iridescent White. When the pieces are complete, I spray them with a clear polyurethane paint. Metallic paints can dull in time, but if sprayed with polyurethane, the color will be permanent. Depending upon the desired effect I will use either a glossy or matte polyurethane coating.
My work mostly illustrates a high gloss metallic palette, by preference. You can use any combination of painterly effects, the results are endless! As I have loved the excitement of glazes for so many years, it is wonderful to move into a new technique, permitting my voice to permeate a new body of artistic exploration. You can view a video on this technique on my YouTube Channel, https://youtu.be/YURYNks7zhg
Love the clay, Love the growth.

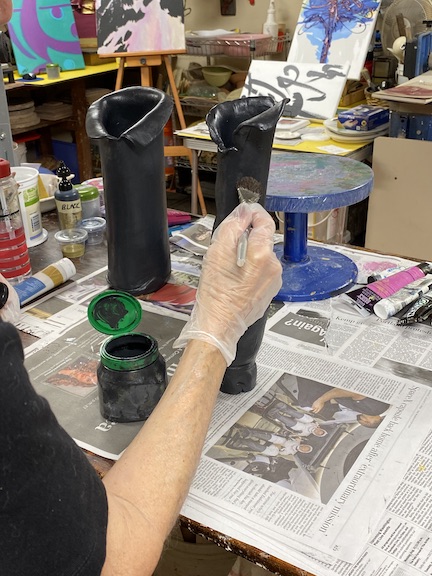
1. Black Based Patinas
The colored pieces begin with a black base, and then colored patinas are used over. I don't use a strong black, rather, I tone it down with some white to yield a charcoal grey. This is a great base for patinas.
2. Painting Base Coat
I apply the charcoal grey mixture with a soft brush, covering the entire piece. I use latex gloves to make clean up easy.
3. Gold Metallic Patinas
These metallic patinas can be purchased in tubes and bottles, I use both. The tubes are better for the rubbed patinas, I use the cheaper thinner, bottled acrylics for the base coats.
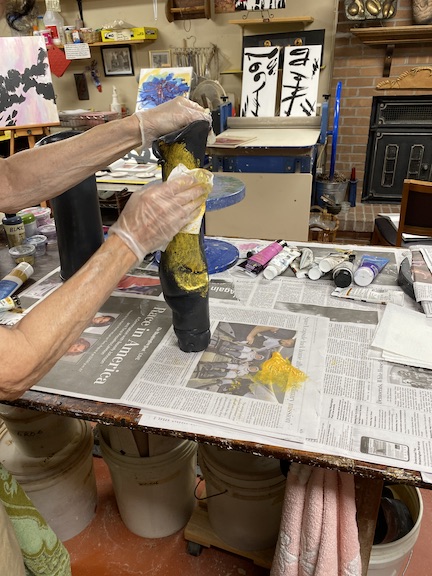
4. Paper Towel Application
I lay down acrylic on the newspaper, and begin using a paper towel for the applier. I can add different colors and mix them on the newspaper, then apply to the form.
5.Gold Patina Applied to Base
I apply the acrylic with the towel, freely rubbing it onto the form. I rub quickly, letting the paint play with the surface of the pot. I let some of the base, black in this case, to seep through, providing an uneven appearance.
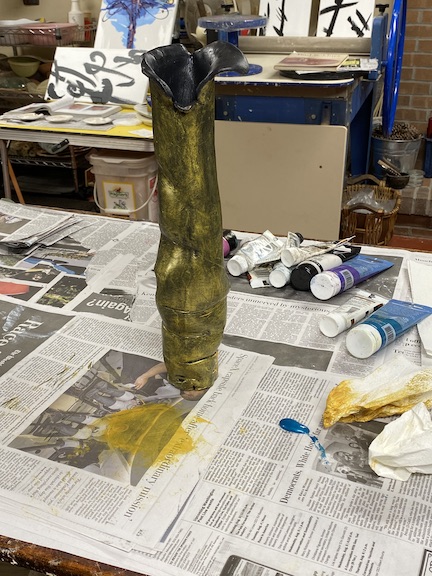
6. Gold Patina Over the Black Base
I apply the gold over the entire piece, moving quickly in straight lines and circles, developing a differentiation of color.
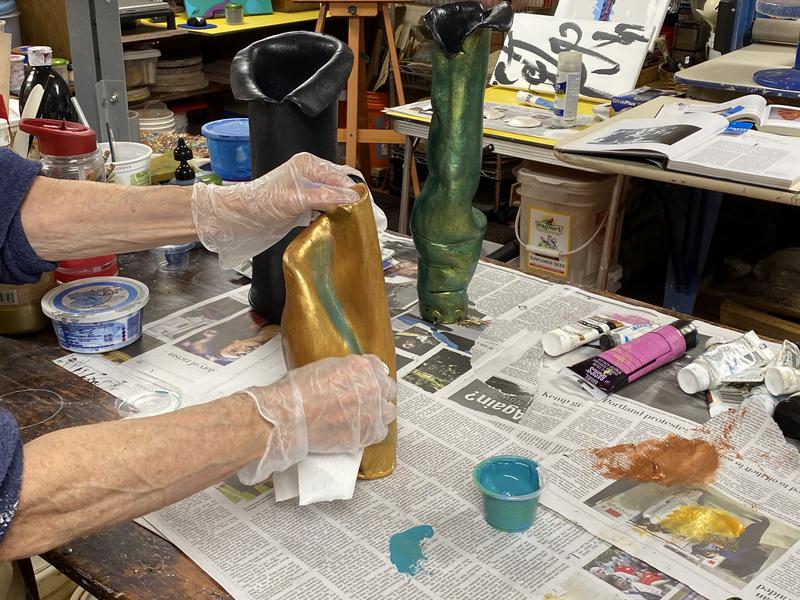
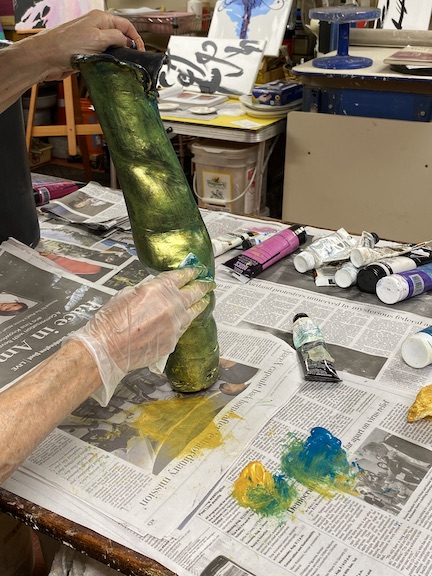
7. Cyan Metallic Over Gold
I apply various paints to develop my color combinations. After the gold patina I use a metallic blue, which then creates a mottled green patina. Try many colors, applying them both to a dry base or a newly applied damp base. Each application will provide a different effect. This is where creativity, surprise and fun builds.
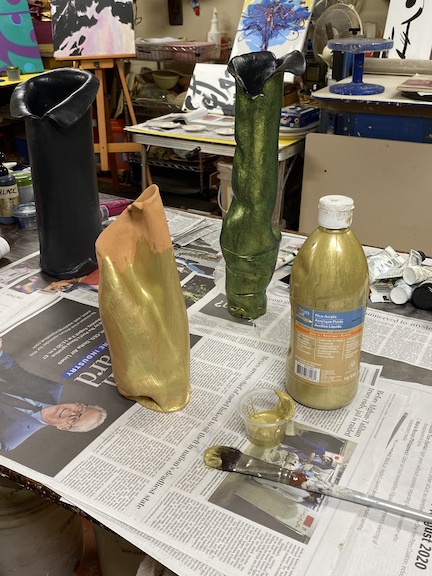
8. Gold Paint Base
Another combination is beginning with a gold base. I then cover the piece with copper and cyan acrylics. For the base, I use a thin paint, as shown with Loft Flow Acrylic. When painting the base, use a thinner less expensive paint than the tubes which I use for patina effects.
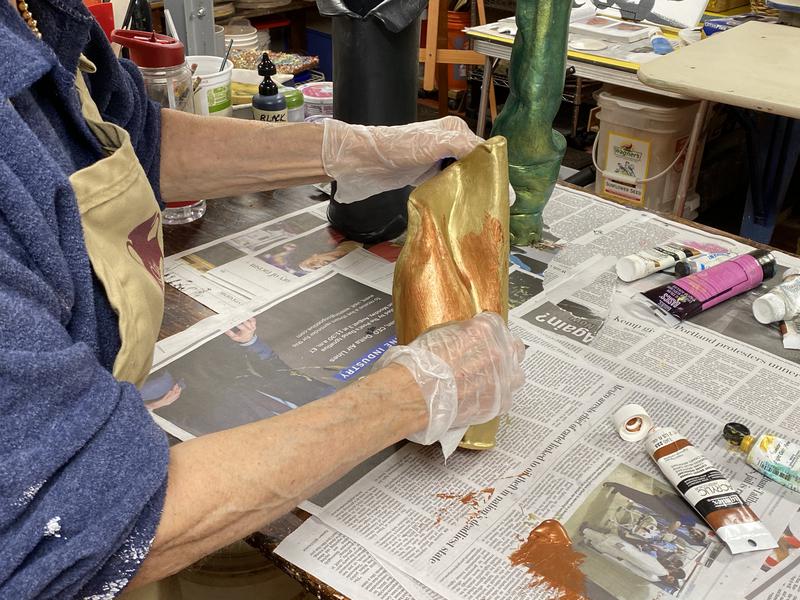
9. Applying Copper Patina
Begin applying the next color over the gold base. I like to use copper along with gold to achieve a rich warm color.
10. Applying the Cyan Patina
I then apply a cyan mixed with paint to provide coloration in shadow areas. Again, paint over both dry and damp surfaces, providing variety of color.
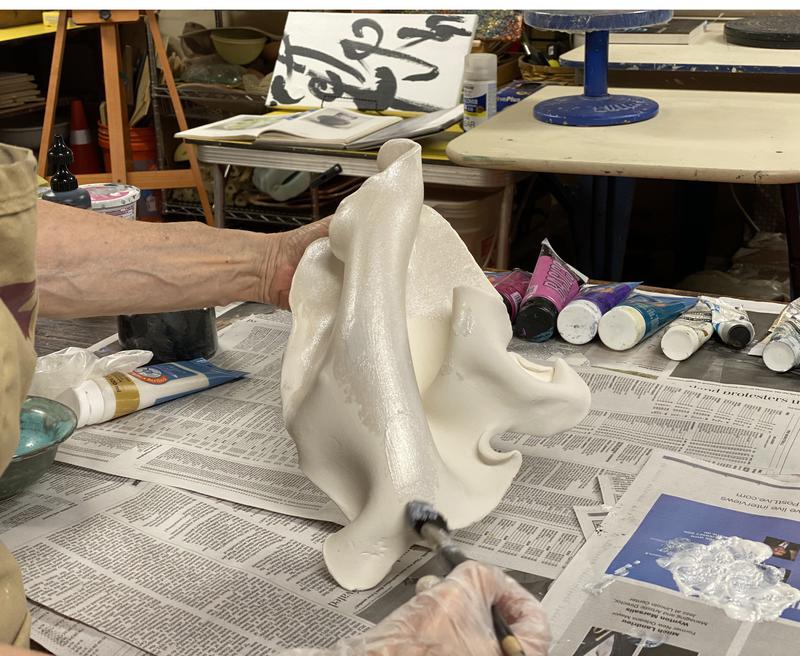
11. Painting White Base
I apply an iridescent white acrylic as the base coat.
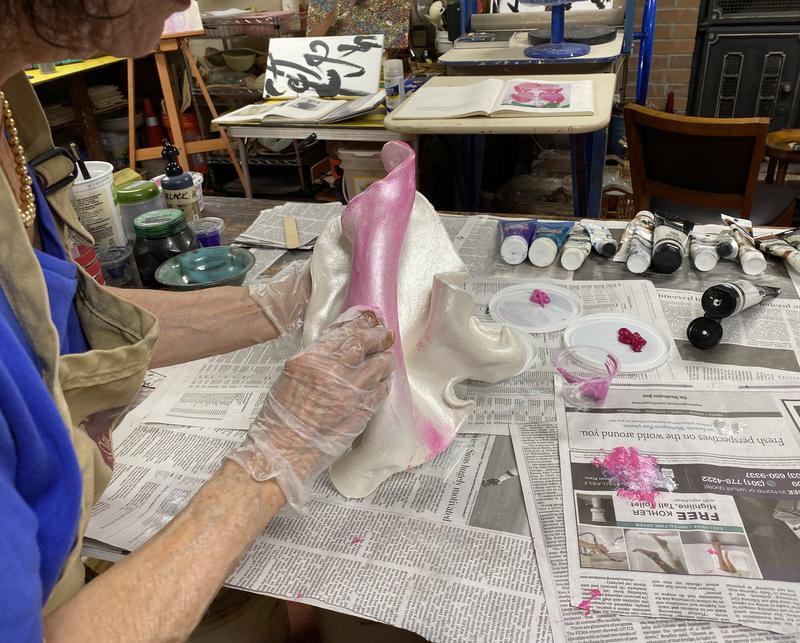
12. Pink Patina on White Base
I add pink paint on top of white paint.
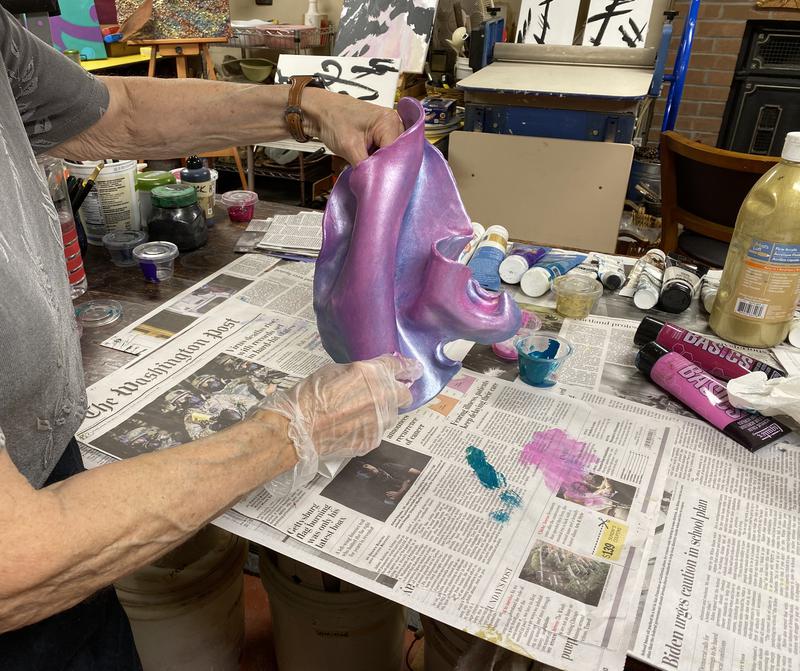
13. Pink and Blue Patinas on Porcelain
Apply blue paint and rub into pink and white paints
I met Voulkos one summer in Saratoga, NY, remembering him saying that if you weren't going to use the piece for eating, why bother dealing with glazes? That was a turning point for me.
About the Author
Jayne Shatz, artist, educator and ceramic historian, has a PhD in Prehistoric Ceramics, an MA in Pottery and Sculpture and a BA in Art History. A ceramic career spanning over 47 years, she has directed college programs in New York, founded two potters' cooperatives and exhibits her pottery and sculpture. She has been writing for many years, publishing articles on ceramic history and techniques and has been producing educational ceramic videos, distributing them through her website.
This article is printed with the permission of
Ceramic Arts & Perception/Technical
Published #117, 2021
http://www.mansfieldceramics.com/